
Epoxy Resin: Explaining Its Role in DIY Jewellery
In the world of DIY creations, some combinations stand out because they complement each other functionally and visually. Think fabric and embroidery, clay and glaze, and of course, jewellery and epoxy resin. This duo is the perfect example of creativity meets crystal-clear shine.
Apart from creating a high-gloss, glass-like finish, epoxy resin brings a host of advantages to your jewellery creations, from layering to sealing delicate elements. Let’s explore some of them.
Sealing

First and foremost, this medium is perfect for sealing delicate elements into your jewellery creations. It preserves their beauty while adding a glossy, protective finish.
For instance, you might want to seal tiny dried flowers, delicate pressed leaves, intricate paper cutouts, or even small keepsakes like a lock of hair into a custom pendant design. Paired with a bezel frame, these meaningful details can be carefully arranged and preserved under a glossy layer of epoxy resin.
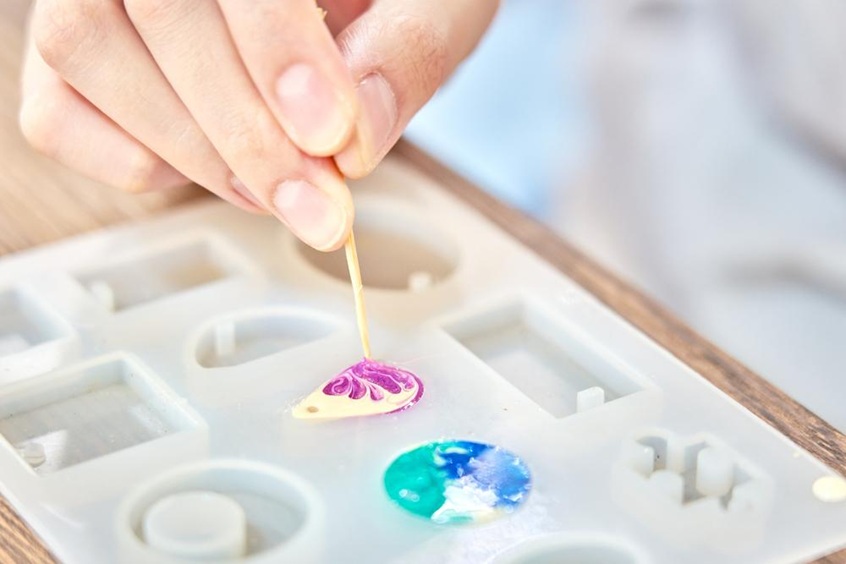
Using a high-quality epoxy resin that comes in a bottle with a nozzle allows for precise application, so you can carefully fill small spaces without the mess. When working with tiny objects, the precision tip lets you direct the flow exactly where you need it. Instead of flooding the whole piece, you can carefully seal around the object and lock it in place without shifting or bubbles.
Besides resin in bottles with nozzles, which are great for controlled pouring, there are other formats that offer ease and precision depending on your project needs. For instance, resin can also be found in syringe-style applicators for fine detail work or in bottles, which are more suitable for larger-scale projects.
Layering
Next, this glossy coating can be used for layering. By pouring the resin in thin stages and curing between each layer, you can create beautiful three-dimensional effects that add depth and visual interest to your jewellery. This process makes pieces feel more dynamic and three-dimensional.
For instance, you might embed a pressed flower in the first layer, then add a sprinkling of glitter or a charm in the next layer to build visual depth one layer at a time. Or you can gradually add pigment to each pour to create beautiful ombre effects, soft colour gradients, or a sense of depth that draws the eye inward.
Start with a lighter shade and build toward deeper tones. This technique works well for ocean-inspired jewellery, dreamy skies, or abstract colour blends, all made possible with the control that resin layering allows. To achieve these effects, it’s best to use UV epoxy resin since it cures quickly (in minutes) under UV light or direct sunlight.
This allows you to work in stages and bring your layered designs to life with ease. It’s perfect for layering and creating small, detailed pieces like pendants, earrings, and charms where precision and control matter.
Curing times may vary depending on the light’s intensity and the resin layer’s thickness, but in general, it usually takes between 2-5 minutes for the resin to cure. If you are using sunlight, you have to make sure the light source is sufficient and your pieces are exposed to clear, direct sunlight
On the other hand, resins that dry when exposed to air may take hours to days to fully cure. Therefore, they are less precise and harder to control in layering.
Texturing
This is another creative way to use resin in your jewellery projects. It involves pressing a pattern or texture into the surface of the resin while it is still tacky or uncured to add dimension and personality to your creations.
Although the resin has a key role in the process, it’s the texture tool that gives your creations a personal touch. For this reason, you can use a silicone mat with patterns, a scrap of lace, or a piece of mesh from your kitchen drawer. Simply lay your choice of texture onto the semi-cured resin, gently press it down and let it sit for a few minutes before carefully lifting it away to reveal a stunning pattern.
Protecting

Last but not least, apart from sealing, layering, and texturing, epoxy resin can act as a protective barrier. Once cured, it forms a durable, glossy surface that shields delicate elements like flowers, glitter, or pigments from moisture, UV exposure, and everyday wear.
When your DIY jewellery lacks a resin layer, delicate elements can degrade over time. Flowers and paper can absorb moisture, pigments can fade, and glitter can become dull. However, when epoxy resin doesn’t just look pretty, it prolongs the life and appearance of your handmade piece.
For optimal durability and protection, you can apply multiple layers of clear epoxy. Each additional coat provides extra thickness and protection, particularly in pieces like rings, bracelets, or keychains, that are prone to wear, scratches, or moisture exposure. However, it’s important to allow each coat to cure properly before adding the next one.